Hello, eXplorer(s)!
In this tutorial, I will teach you how to use the Tasks Interaction:
.
1.1 Go to the Journey Map footer and click Add Interaction.
.

.
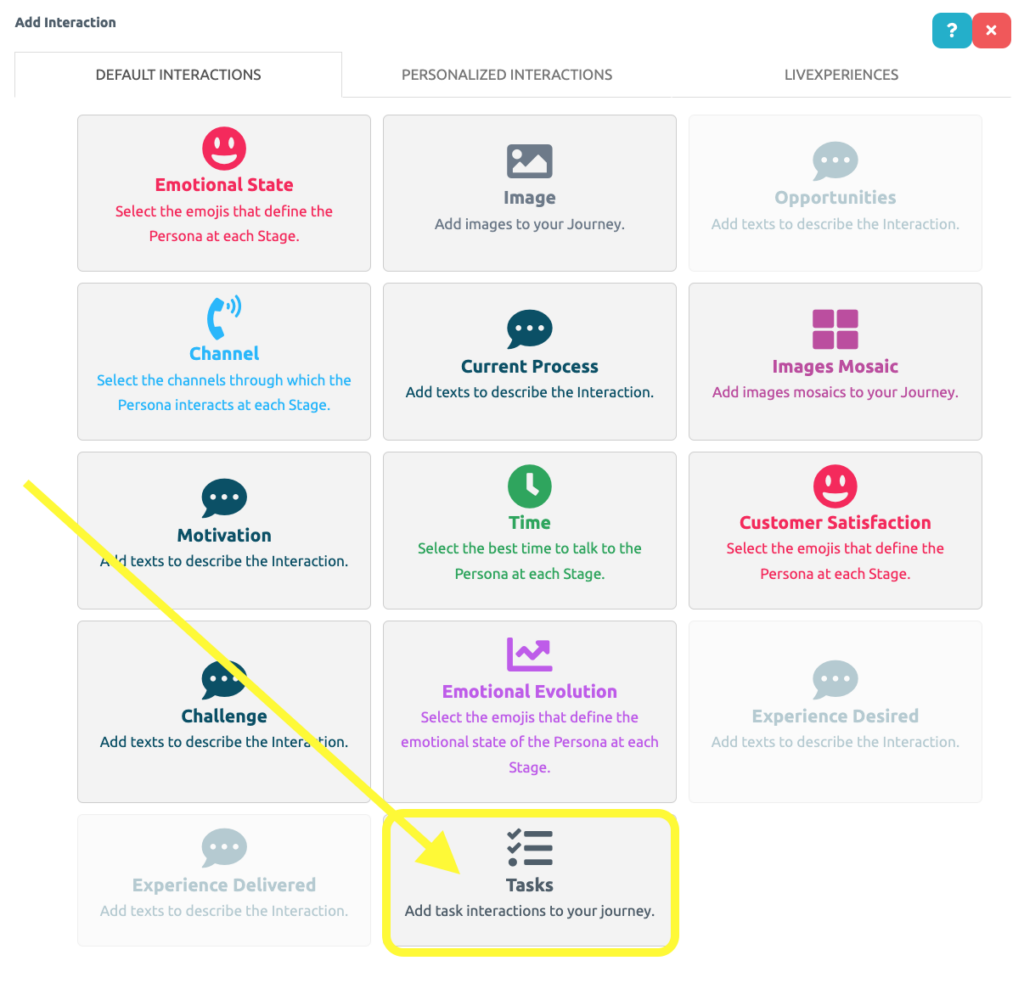
2. Click on the Tasks Interaction, as shown in the following image:
.
.
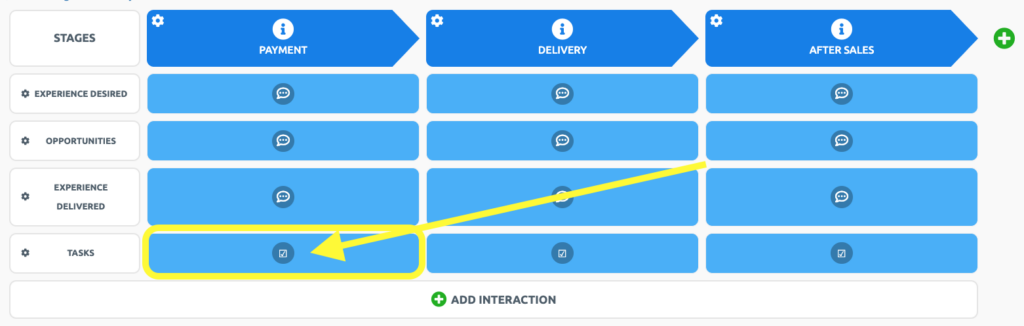
3. Great! The Interaction has been added to the Map, as indicated by the yellow rectangle. Now click the space indicated by the yellow arrow to add Tasks.
.
.
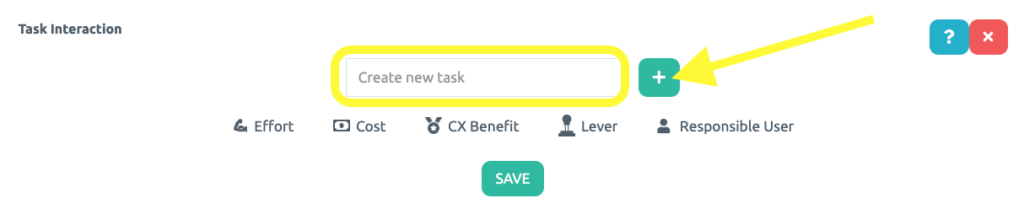
4. Describe the Task in the field circled in yellow and click the + icon to add it.
.
.
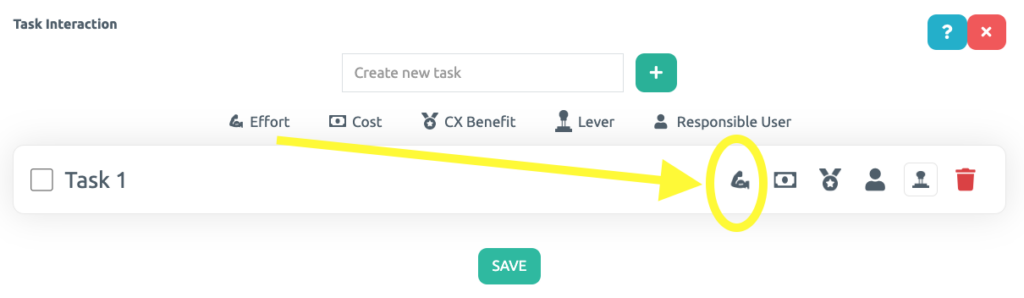
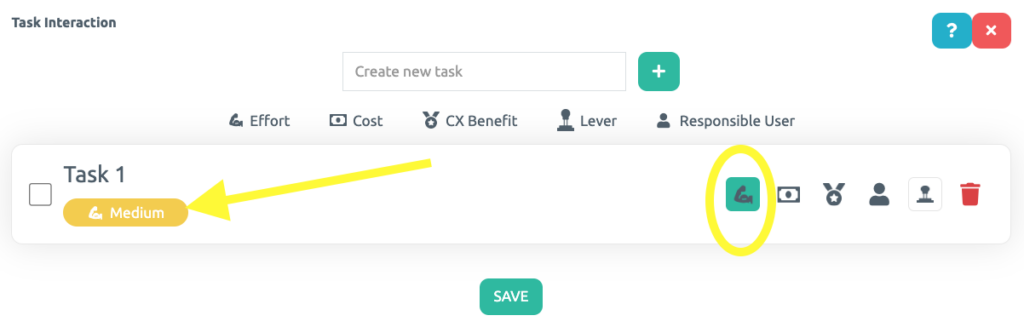
5. The Task has been added. Now it’s time to classify the Task according to the Effort and Cost required to perform it, as well as the Benefit that this task will bring to the customer. To do so, click the Effort icon shown by the yellow arrow below:
.
.
6. Notice that the effort icon turned green and another icon indicated by the yellow arrow appeared. Use this icon to change the intensity of Effort required to complete the task.
.
.
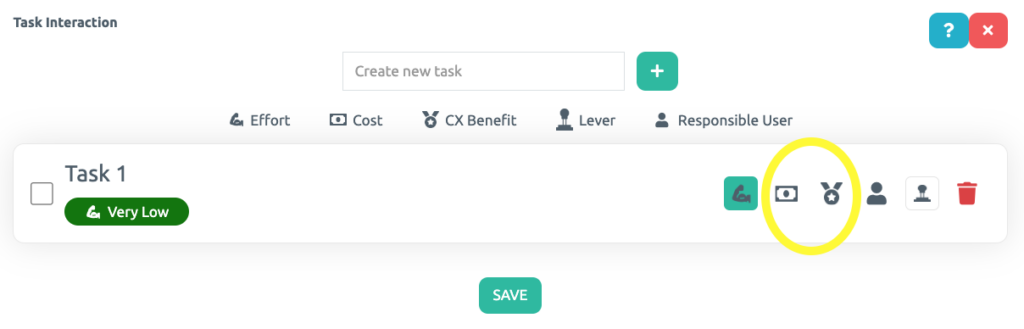
7. Next, do the same for the two icons circled in the following image. Now it’s time to classify the Task according to the Effort and Cost required to perform it, as well as the Benefits that this task will bring to the customer.
.
.
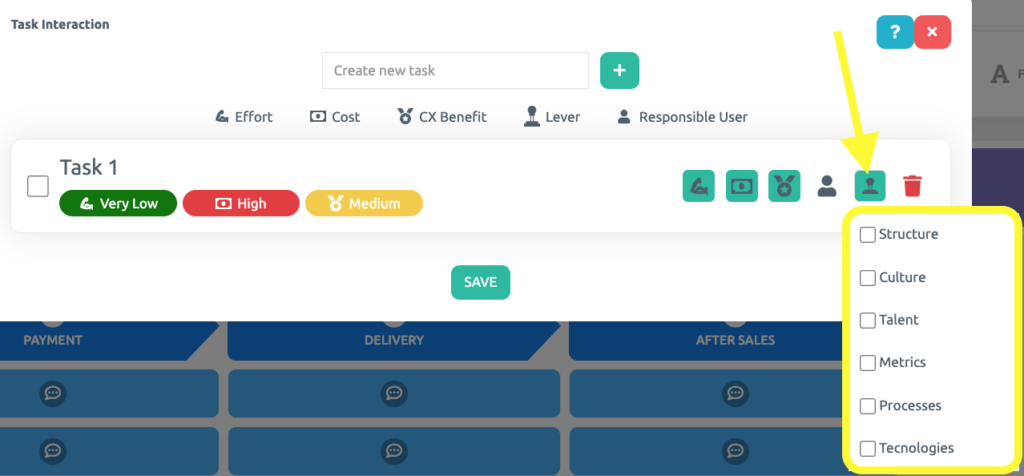
8. With the effort, cost, and benefit classified, identify which Customer Experience lever(s) this activity is related to. Check the image for further details.
.
.
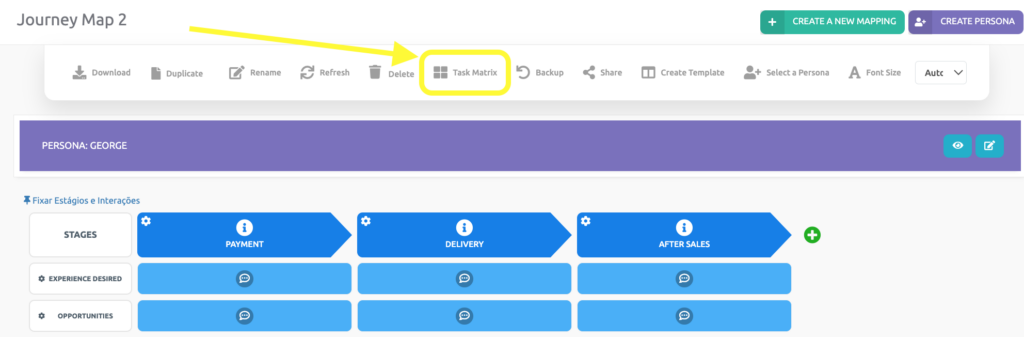
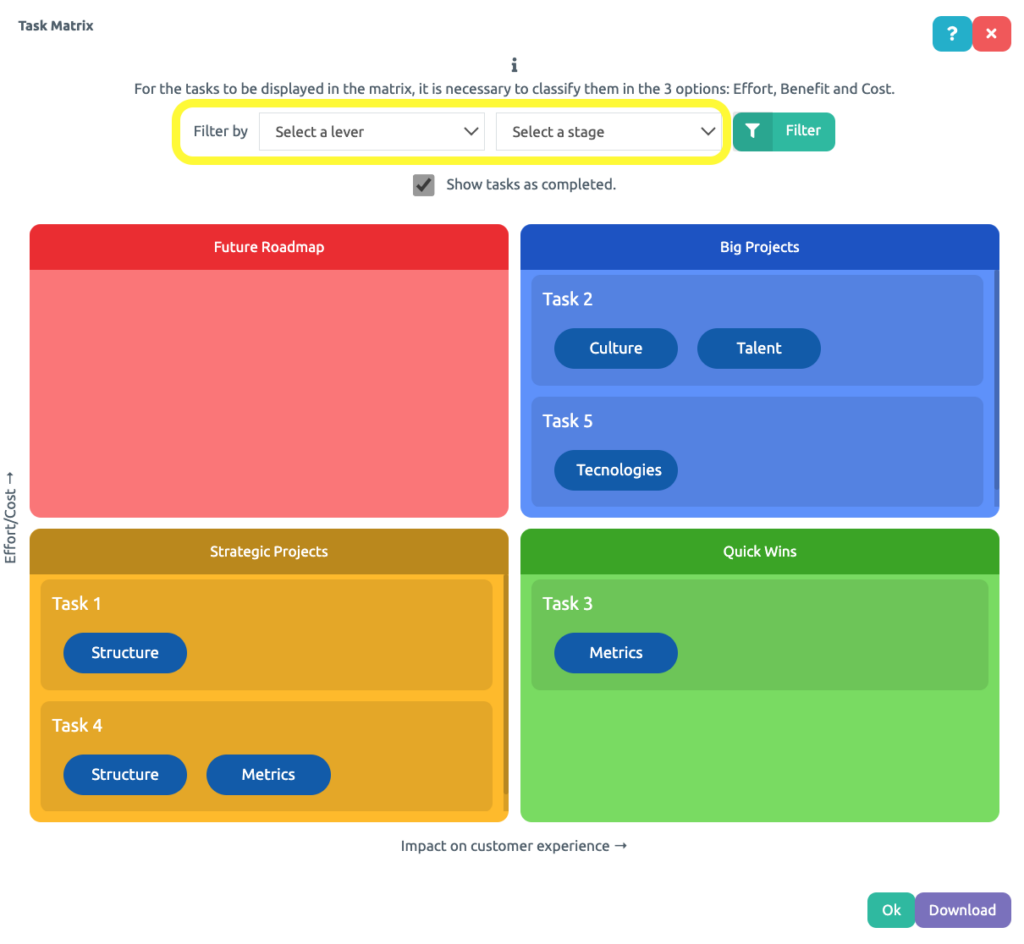
9 Finally, you may access the Task Matrix that will help you prioritize the tasks.
.
.
10 Filter the tasks by its lever and/or by its stage in the Task Matrix. At the root you may find the purple button Download, that is a customized PDF.
.
.
See you in the next tutorial and keep sharing good experiences with PeopleXperience! 💙


