Hello, eXplorer(s)!
In this tutorial, I will teach you how to Connect Journey Maps:
.
1. Log in the PX platform and click on Journeys on the menu.
.

.
2
.
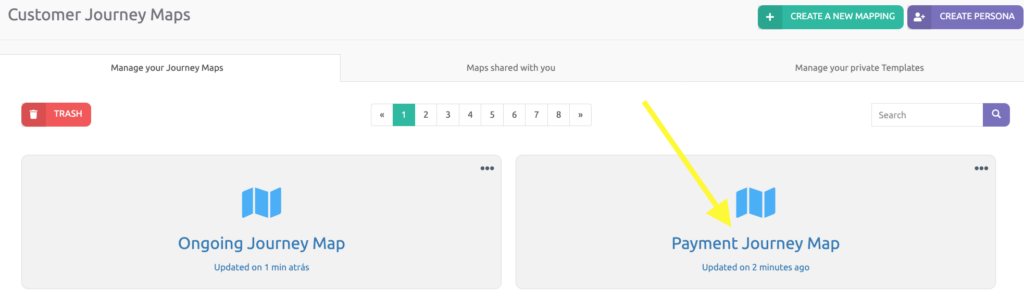
2 Click on the Journey to open it.
.
.
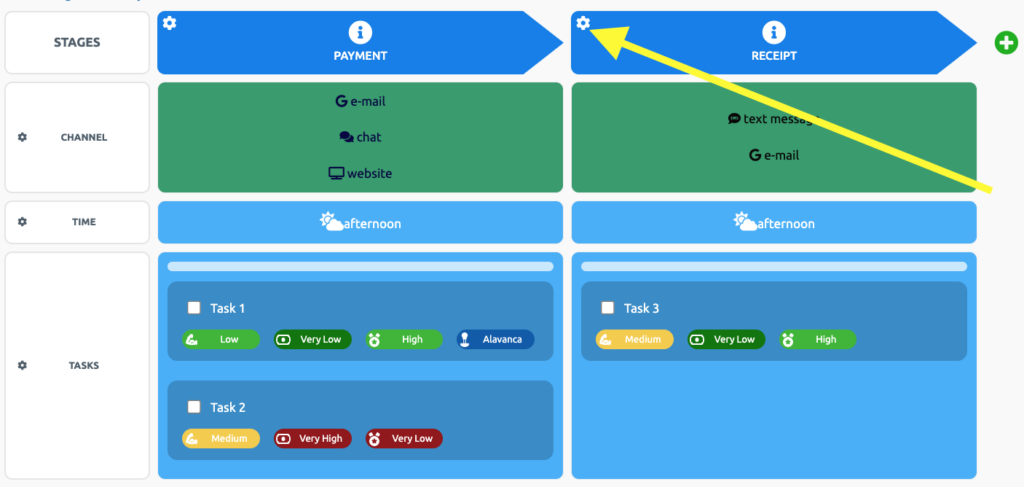
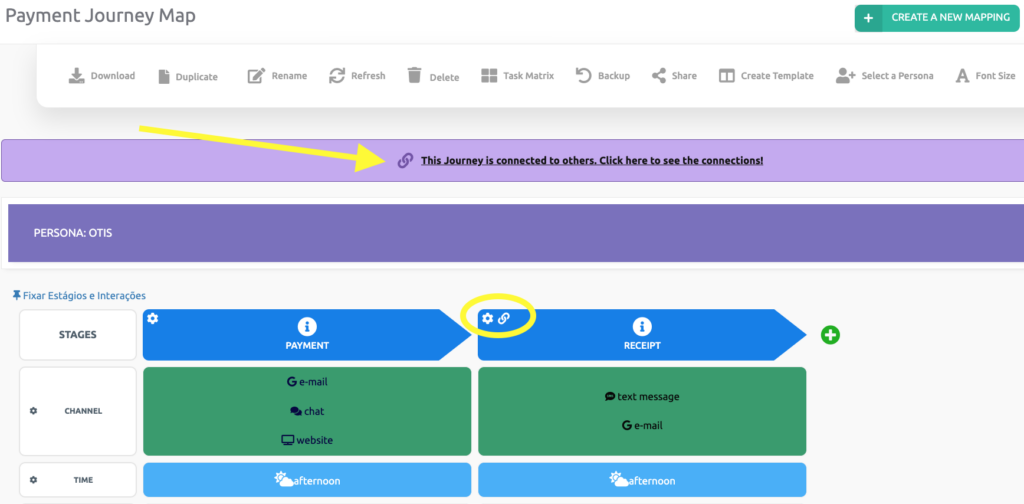
3 This is payment journey, that comes before a ongoing journey, for example. See the payment journey last stage – Receipt – and click on the Gear icon.
.
.
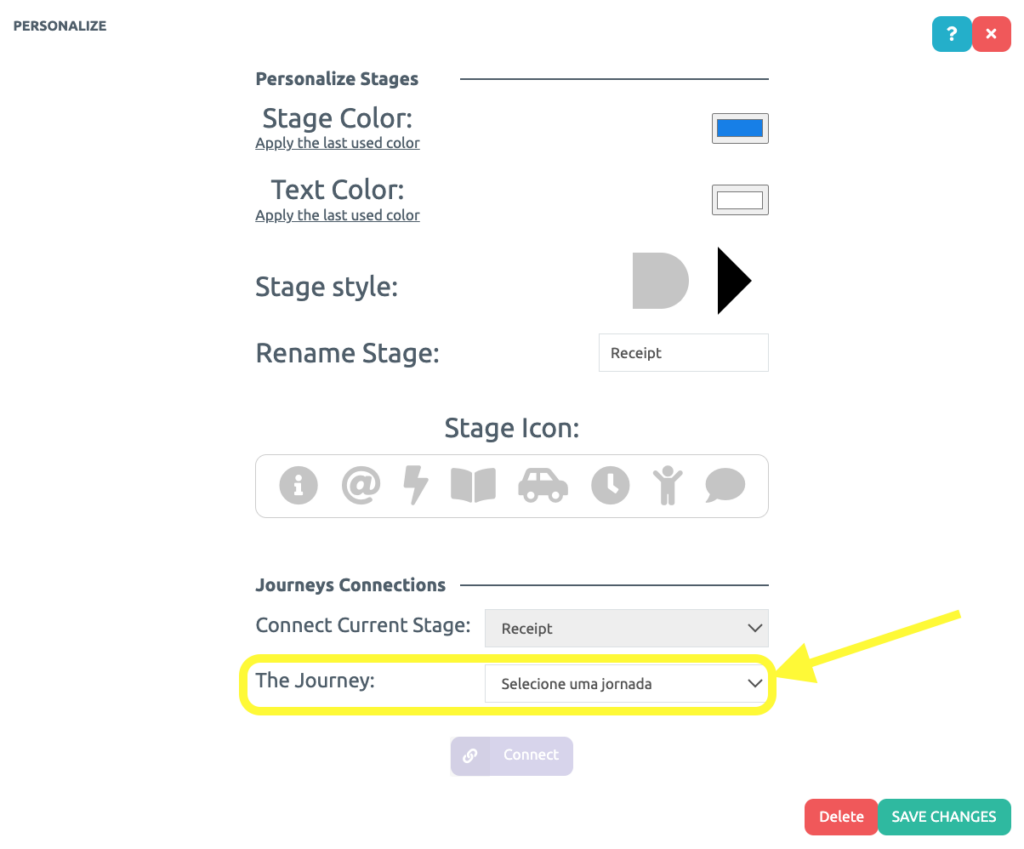
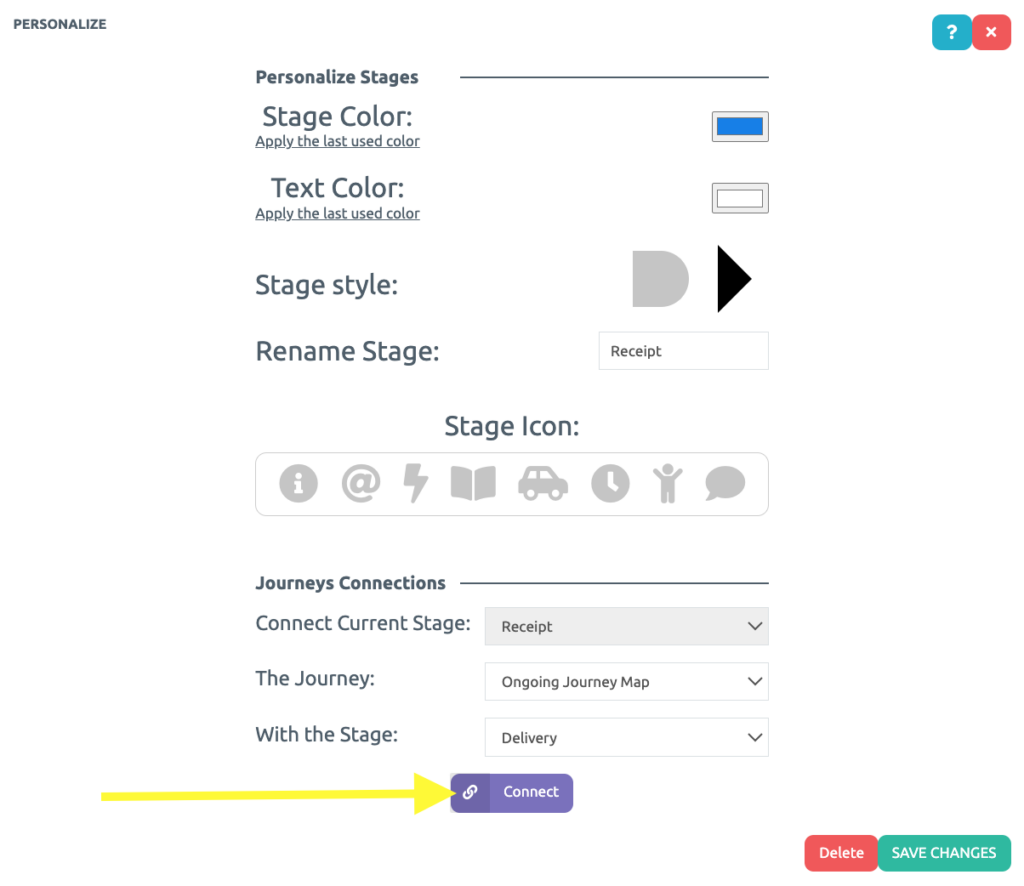
4 In the image below find the Journey Connections and choose the journey that follows this one.
.
.
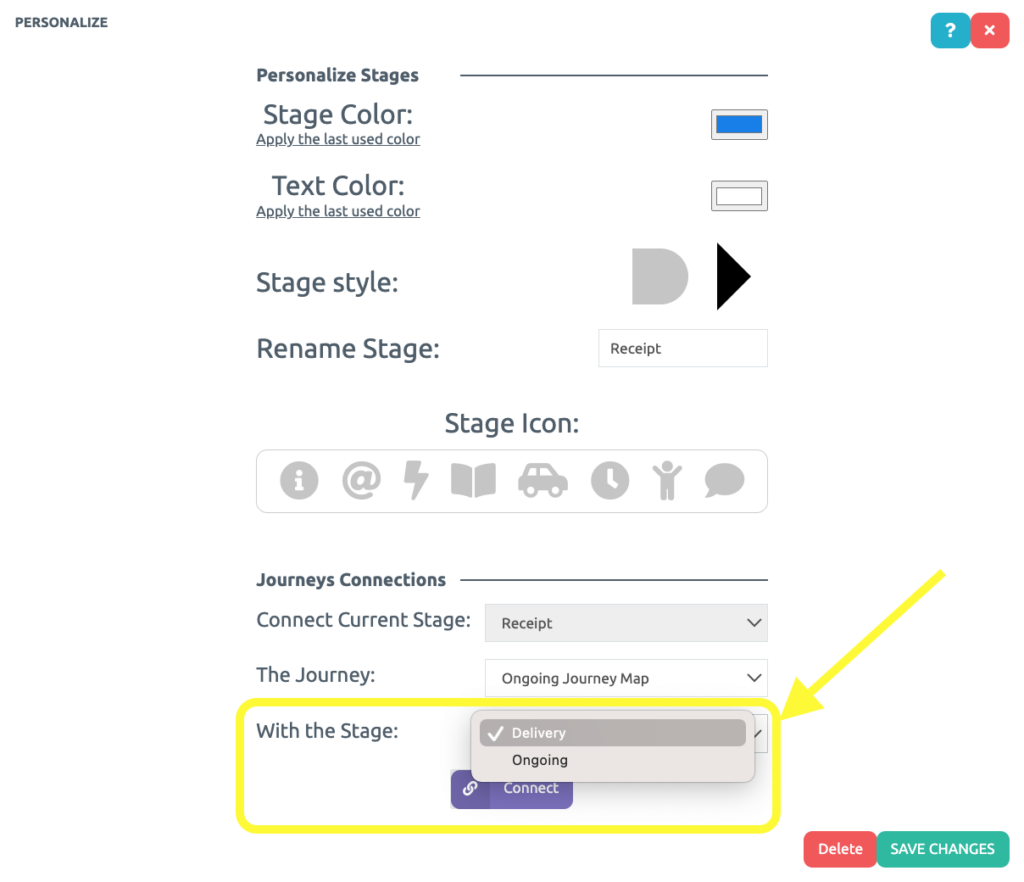
5 Now, select the ongoing journey map first stage – Delivery- to be connected to the payment journey last stage – Receipt.
.
.
6 Lastly, click on the purple button Connect.
.
.
7 Note que um símbolo de corrente apareceu ao lado da engrenagem e uma faixa roxo apareceu no topo do mapa da jornada. Clique na faixa roxa indicada pela seta.
.
.
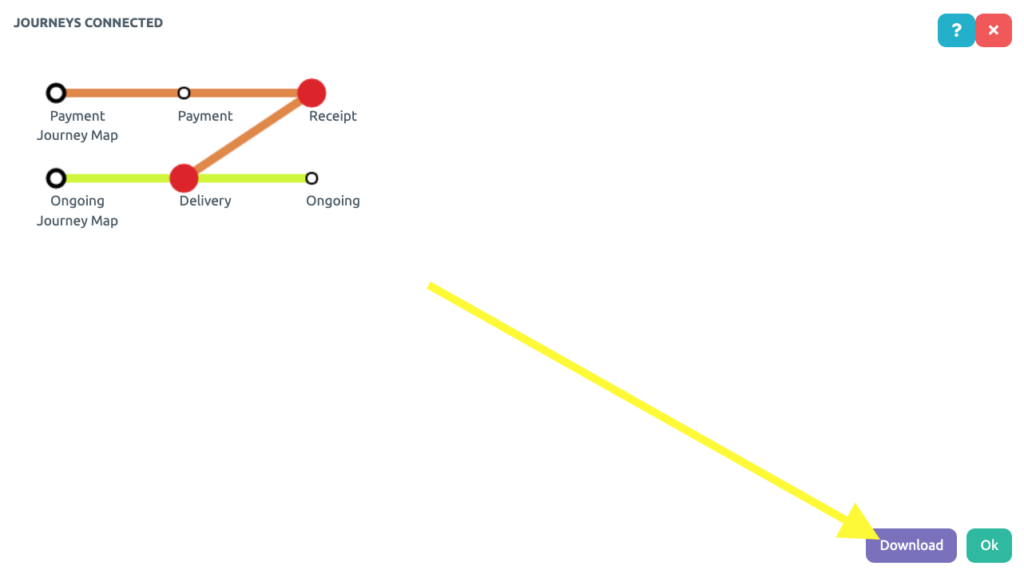
8 Here are the connected journeys! You may export it to PDF by clicking on the purple button Download. See here, at step 3, how to customize the PDF.
.
.
Connect as many Journey Maps as you want!
.
See you in the next tutorial and keep sharing good experiences with PeopleXperience! 💙


