Hey, eXplorer!
In this tutorial, I will teach you how to change colors in a Customer Journey Map.
.
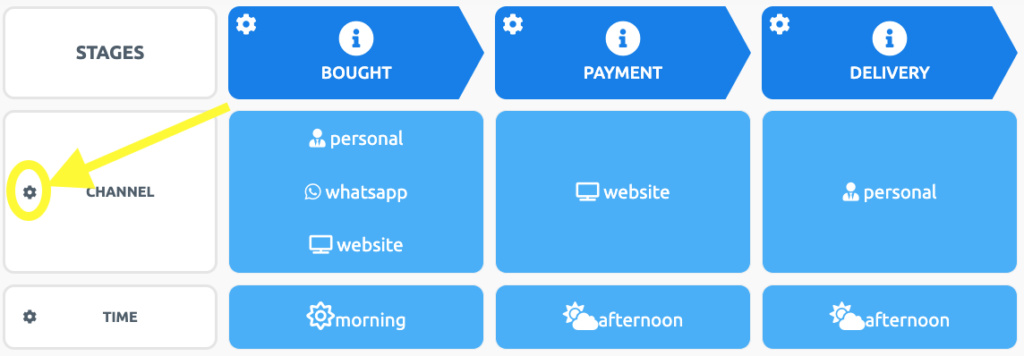
1 In the top left corner of your Map, click the symbol highlighted in the image below.
.
.
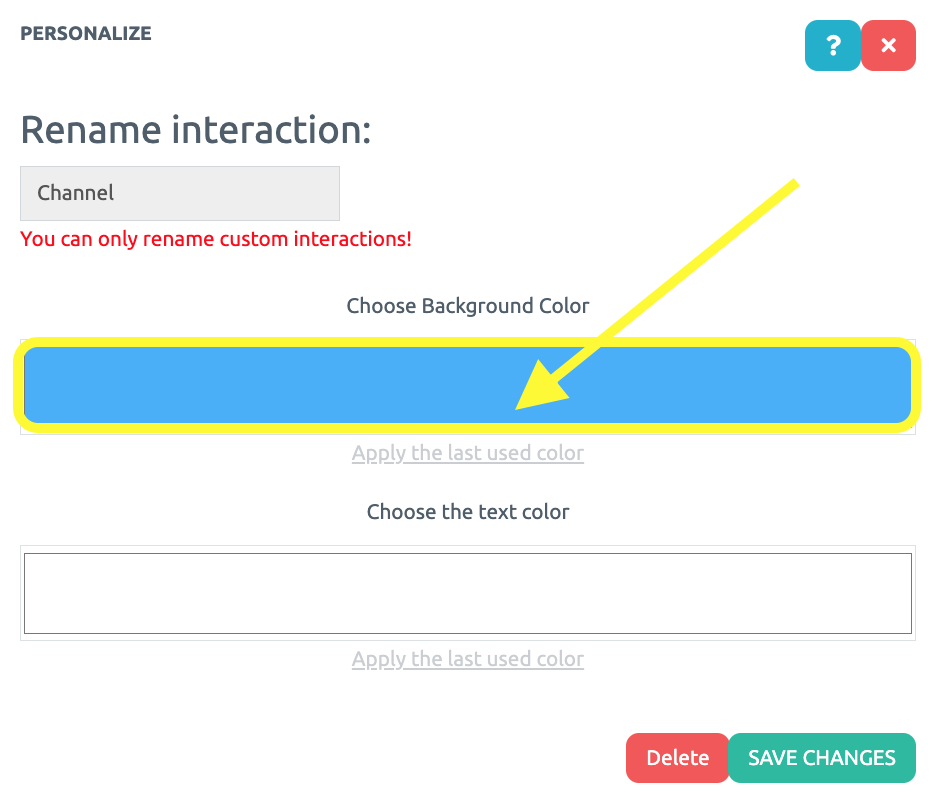
2 Click the rectangle indicated below to choose a background color.
.
.
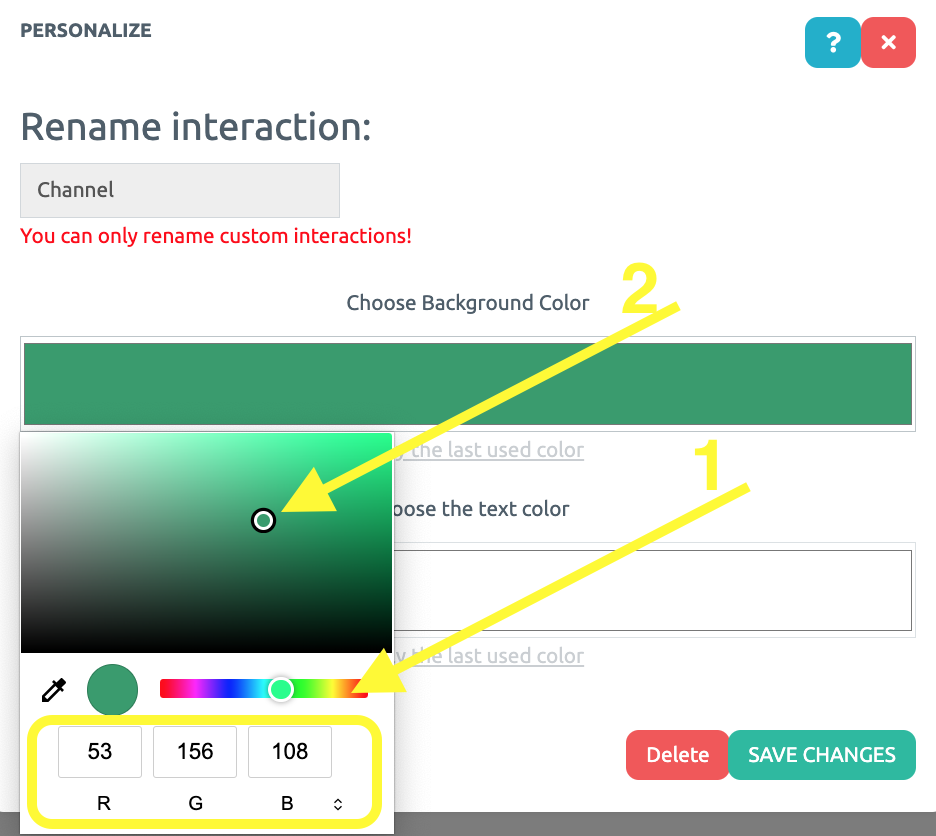
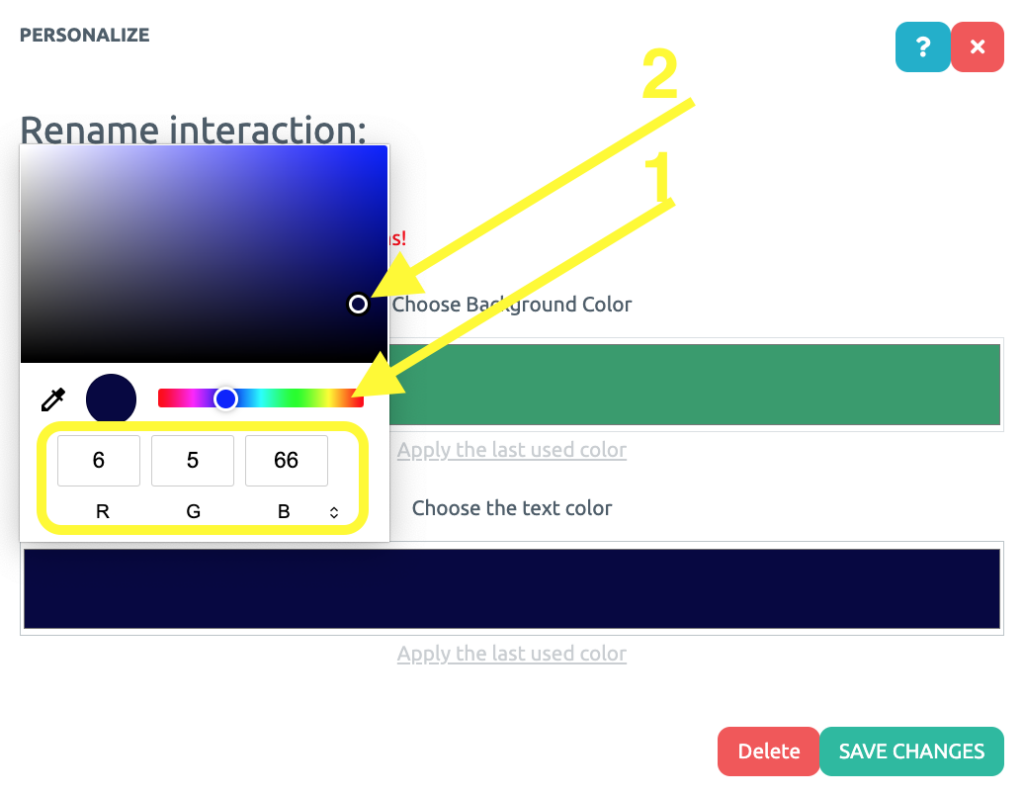
3 There are two ways of choosing a color: you can click the color bar indicated by arrow 1, click the desired background color and then click the square indicated by arrow 2 to choose the shade of the desired color.
Another way of choosing a background color is by entering the color’s code on the field highlighted by a yellow rectangle in the image below.
.
.
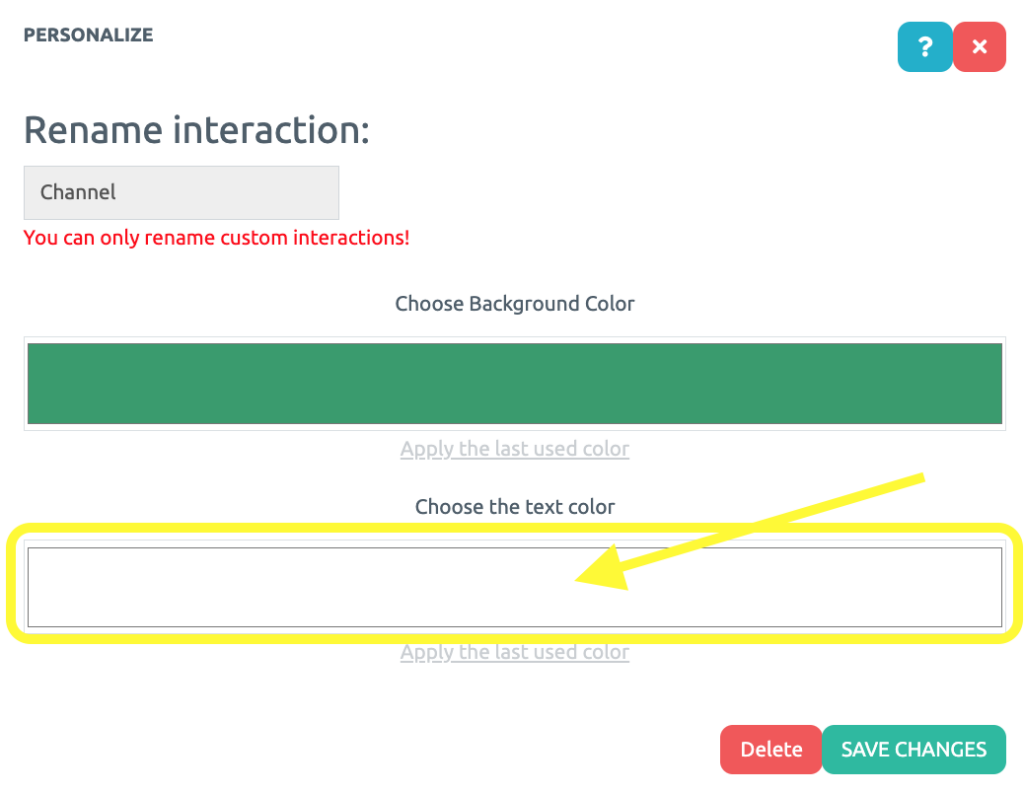
4 That’s it! You have changed the background color. Now, to change text color, click on the square indicated in the image below.
.
.
6 Choosing a text color follows the same procedure as that of choosing a background color. Click the bar indicated by arrow 1 to choose a text color, then click the square indicated by arrow 2 to select the shade of the text color. You may also enter a color code in the yellow field highlighted in the image below.
.
.
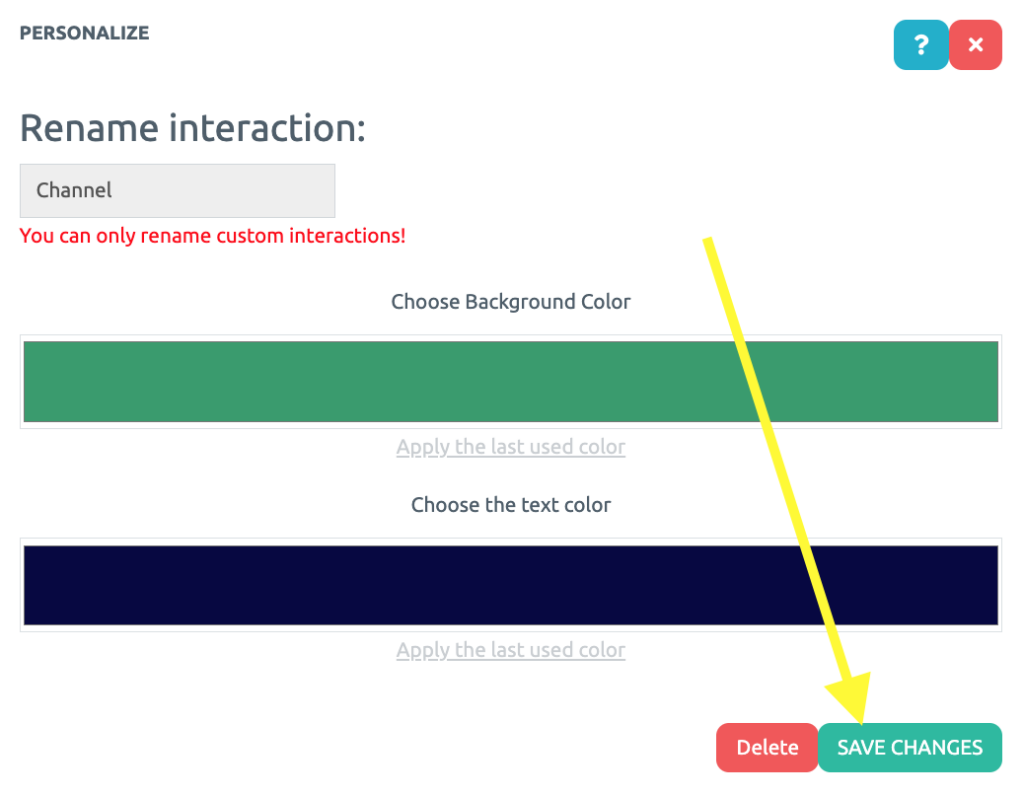
7 Lastly, click on Save changes.
.
.
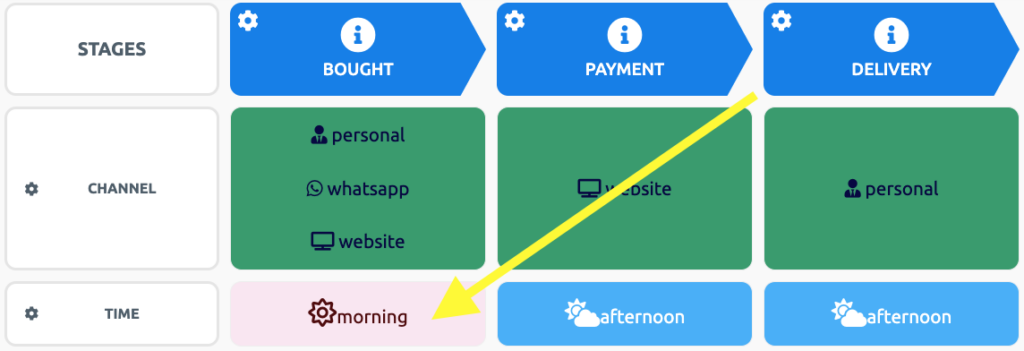
9 You may also change background and text colors one field at a time, by clicking on the field and following the same color and shade steps shown previously.
.
.
10 Change background and text colors for all desired fields, but be careful, since only fields with face, channel interface, time, and text interactions allow this editing. Image upload, emotional progress, and image mosaic interactions only allow the background color to be changed.
.
See you in the next tutorial and keep sharing good experiences with PeopleXperience! 💙


