Hey, eXplorer!
In this tutorial, I will teach you how to create customized stages:
.
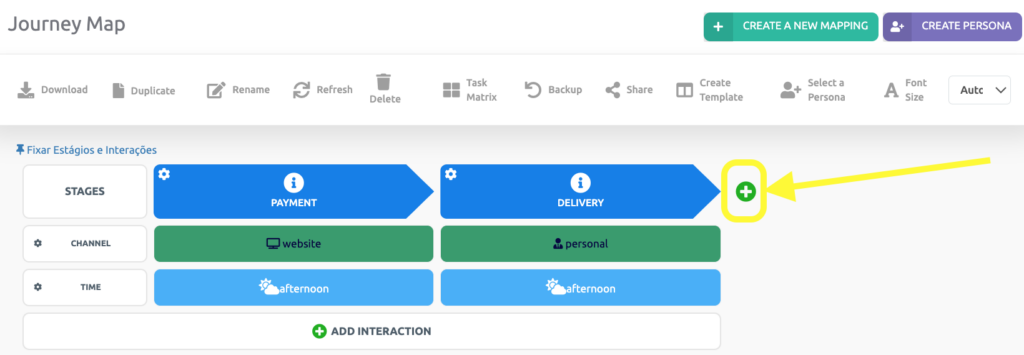
1 In the top right corner of your map, click the + symbol highlighted in the image below.
.
.
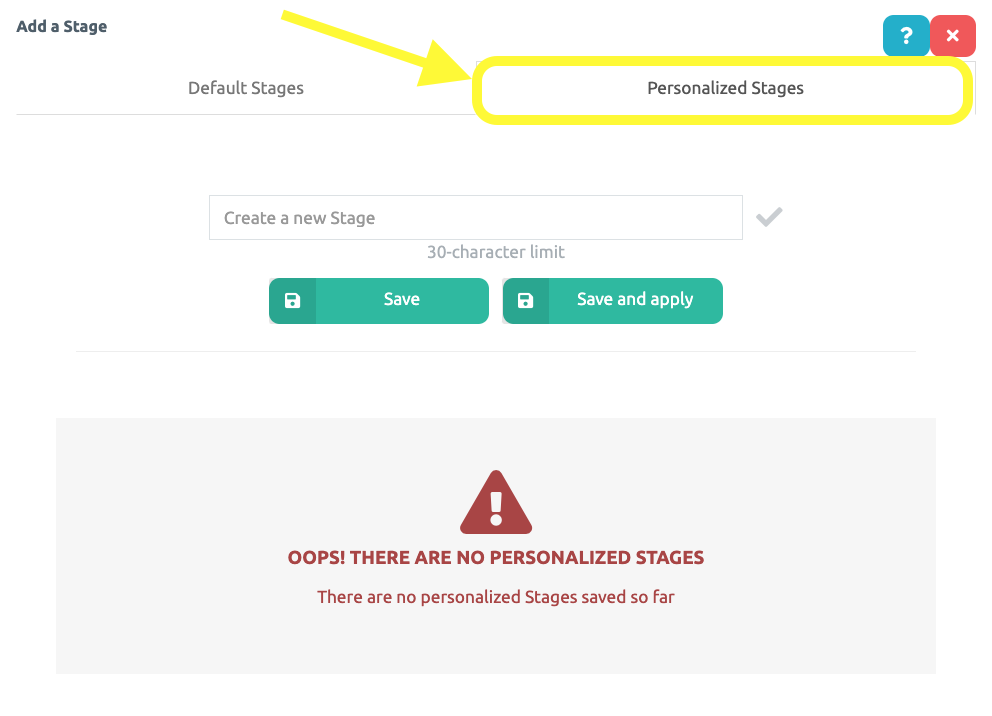
2 Click on Personalized Stages.
.
.
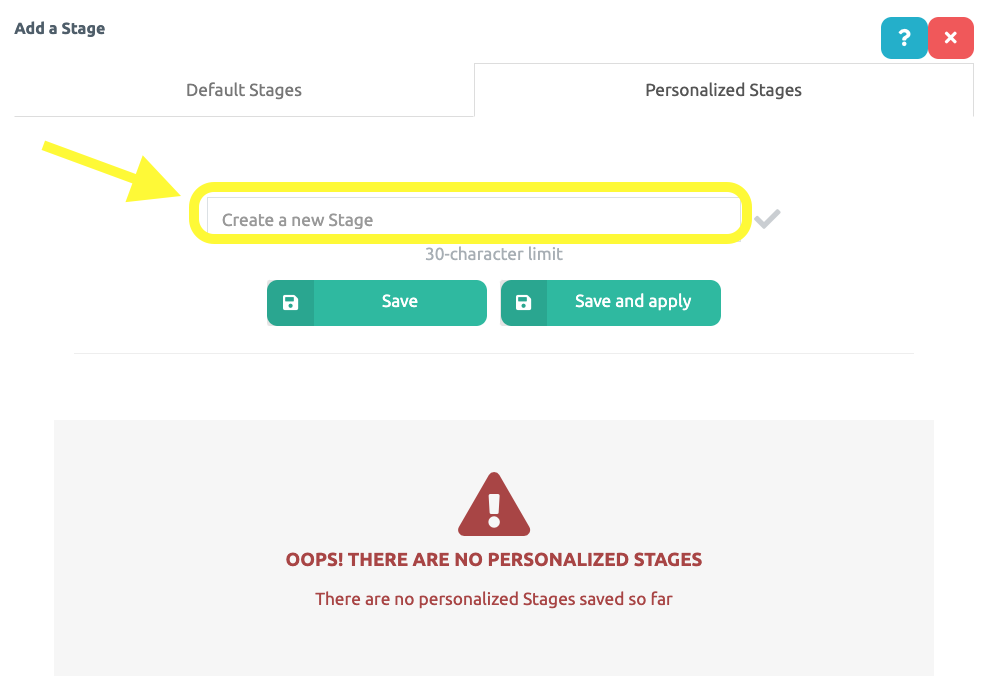
3 On the first field, enter the name of the new stage, based on what makes sense to your journey.
.
.
4 Click Save, to use the new stage later on another Journey Map or Save and Apply, to use the new stage already in this journey map.
.

.
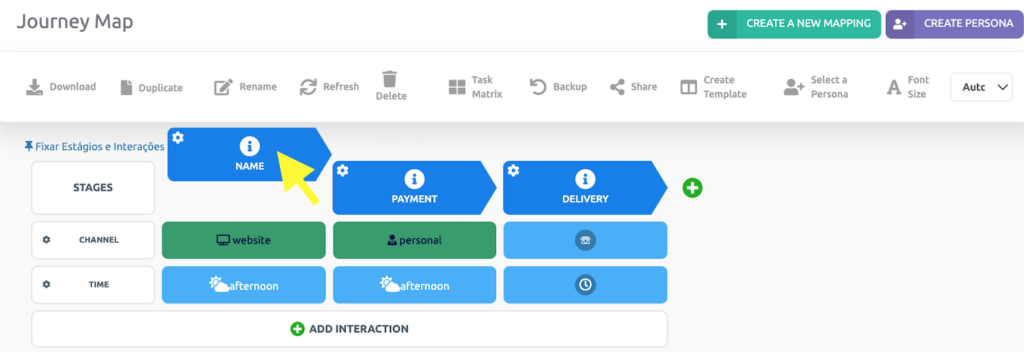
5 You may drag your new stage to different positions in your Journey Map and add content.
.
.
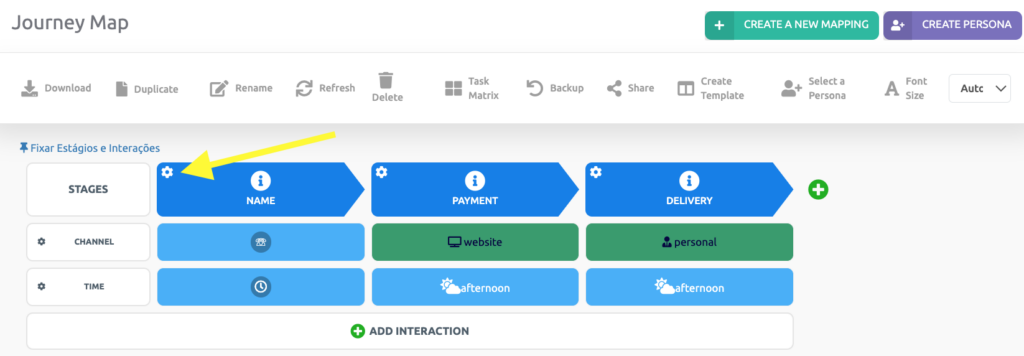
7 If you wish to delete a stage, hover the cursor over the stage and click on the Symbol indicated below.
.
.
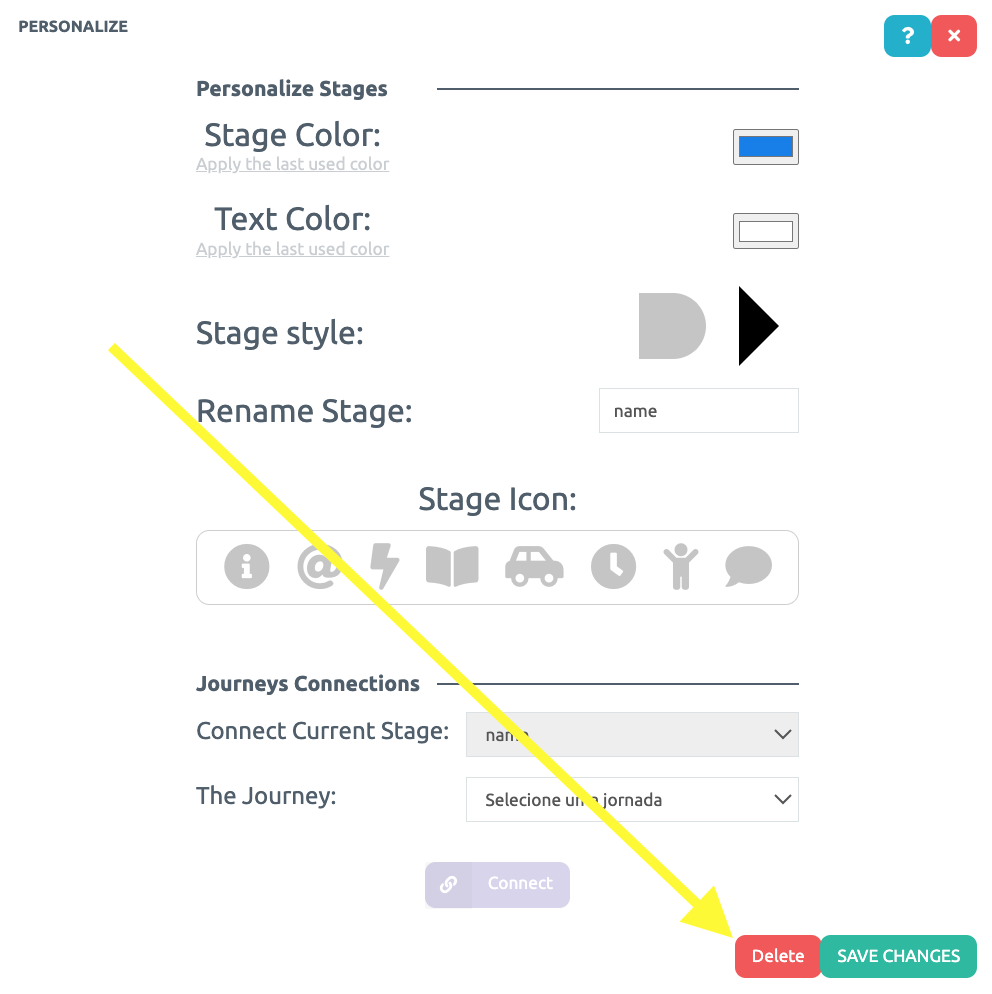
8 Next, scroll down and click on Delete.
.
.
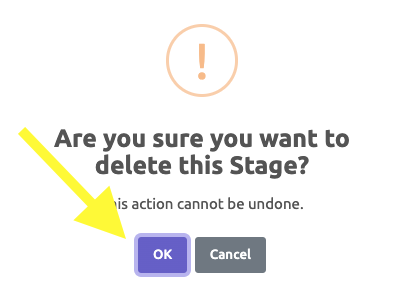
9 Lastly, confim deleting by clicking on Ok.
.
.
See you in the next tutorial and keep sharing good experiences with PeopleXperience! 💙


