.
Hey, eXplorer!
In this tutorial, I will teach you how to assign a user a task in the Task Interaction:
If you haven’t seen how to use Task Interaction, with roles and a priority matrix, simply access here.
.
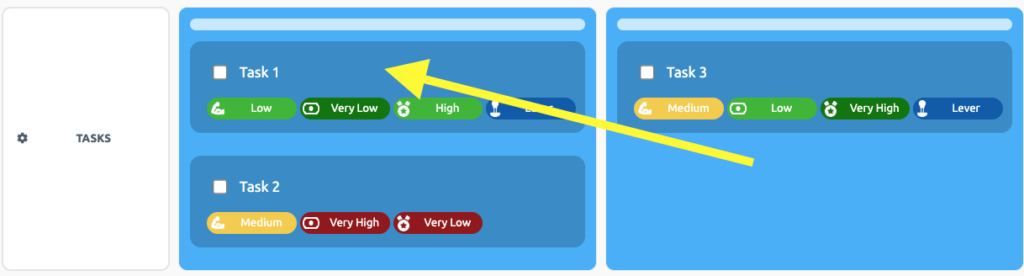
1 Click on the task to which you’d like to assign a user.
.
.
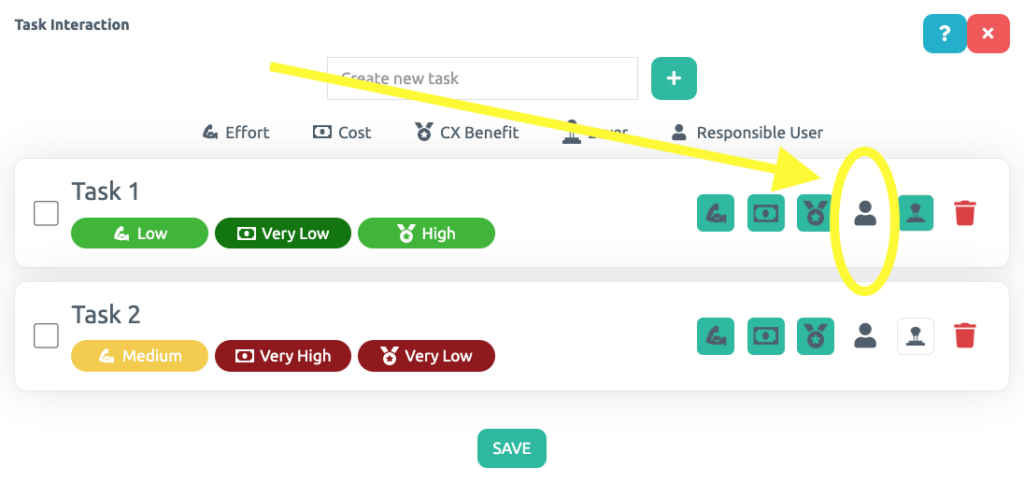
2 Be careful! It is only possible to assign a task to eXplorers who can access the Journey, either through the Corporate Directory or by sharing it – click here to learn how.
Click the User Assigned icon highlighted.
.
.
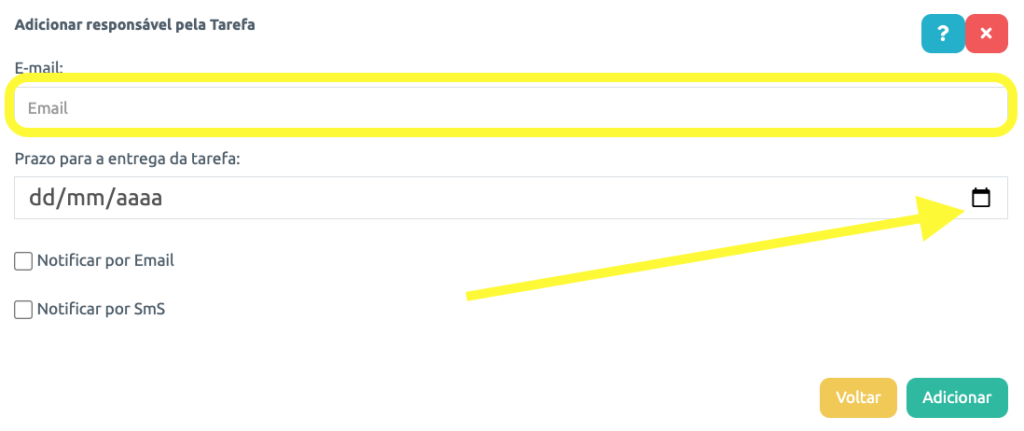
3 Type the e-mail of the User Assigned for the task in the field indicated by the yellow rectangle in the image below. Then, select the task’s deadline by clicking the icon indicated by the yellow arrow.
.
.
4 Select the channel(s) where the User Assigned will receive the task notification, clicking the locations indicated by the yellow circle in the image below.
Be careful! Make sure that the User Assigned has their phone number registered to their profile on the PeopleXperience platform. In this link you can see how the User Assigned can register their phone number.
Click add to assign a task to the User Assigned.
.

.
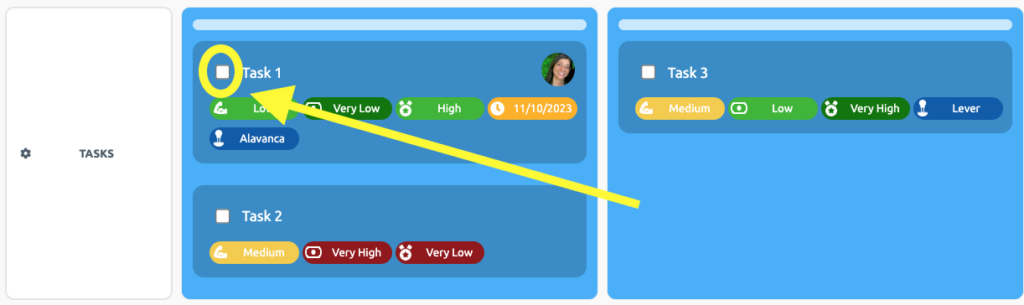
5 Note that the User Assigned icon has turned green. Lastly, click the green Save button indicated below.
.

.
6 Once the task is complete, click the field indicated in the image below.
.
.
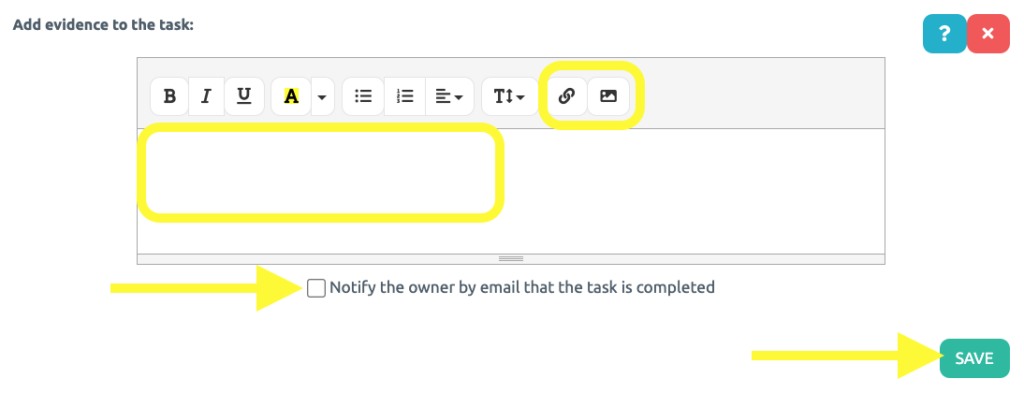
7 A popup window will appear like the one in the image below to insert evidence that the task has been completed. You may insert texts, links, and images. Click the green button to save.
.
.
See you in the next tutorial and keep sharing good experiences with PeopleXperience! 💙


