.
Hey, eXplorer!
In this tutorial, I will teach you how to create a persona:
.
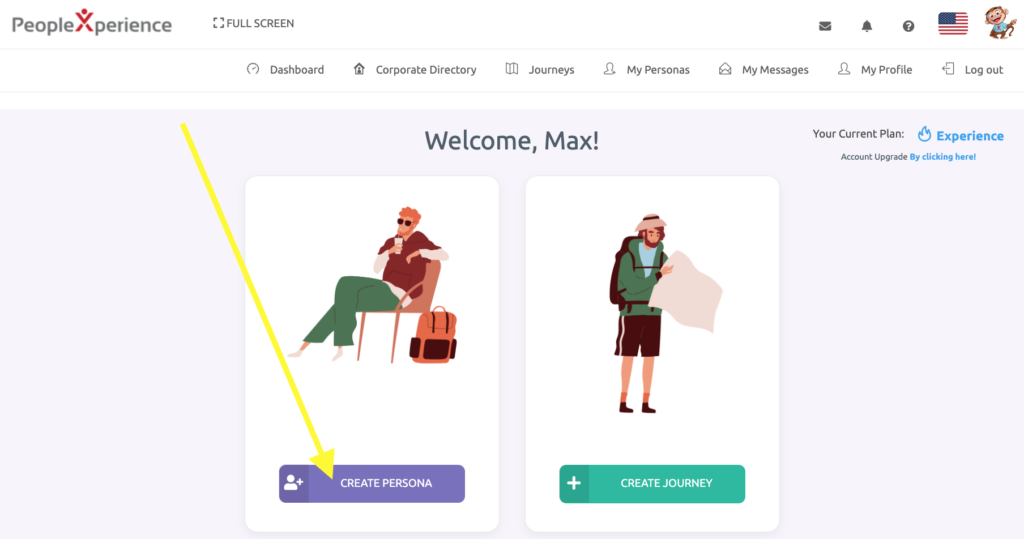
1 Log in the app and click on Create Persona.
.
.
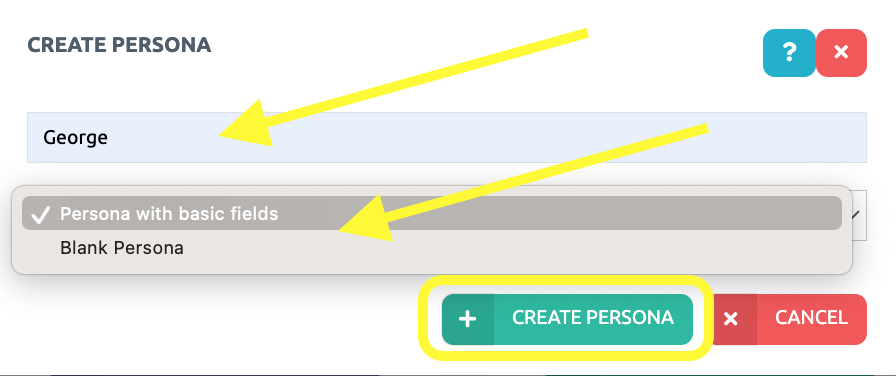
2 Give it a proper name and choose if you would like to use the Persona with basic fields or a Blanc Persona. Then, click on the green botton Create Persona.
.
3 Click on the icon below to start editing a Persona.
.

.
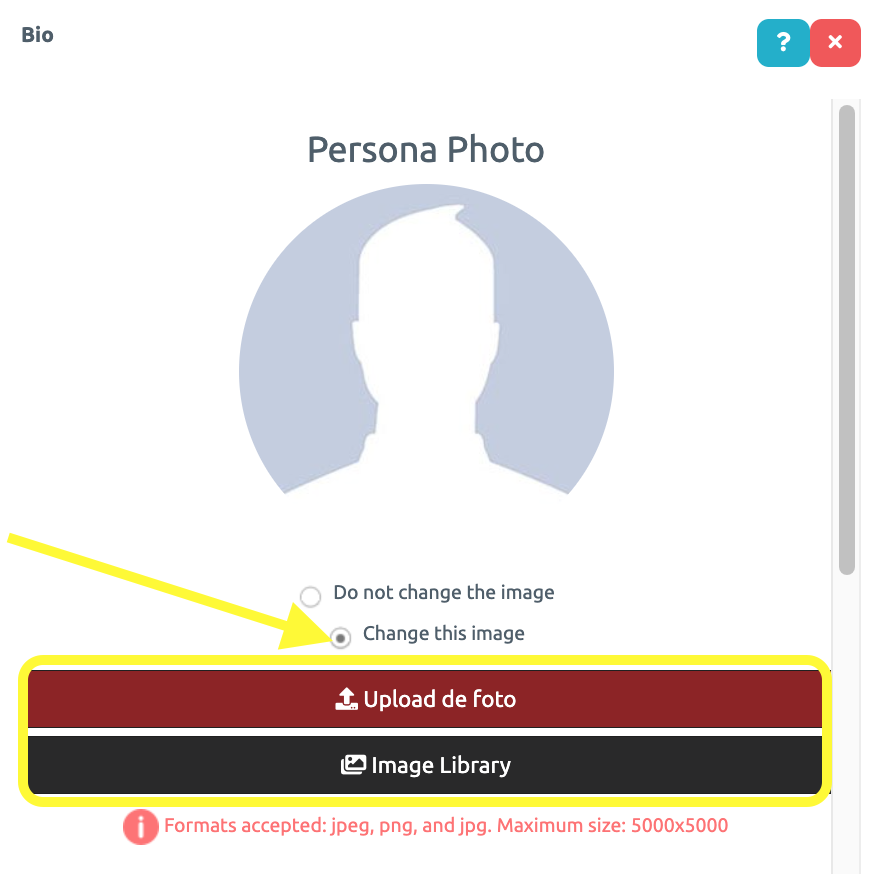
4 Firstly, choose an image for your persona. This could be an image from your computer (choose file) or an image from the Image Library.
.
.
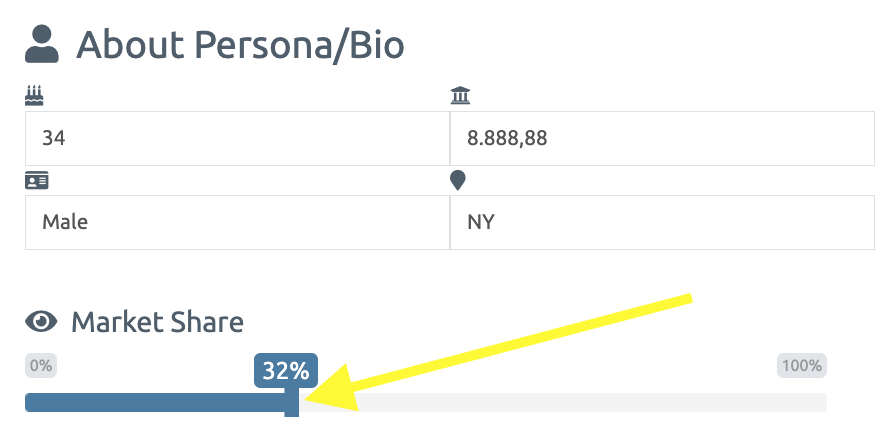
5 Secondly, you will enter some persona data: the persona’s full name, profession, bio, gender, geographical location, monthly income, age and market share (your client percentage). Establish the market share represented by this persona with the blue bar.
.
.
6 Below that, write the CX strategy to be used with this persona and write at least 2 hashtags related to this persona. Finally, click on Save Persona.
.

.
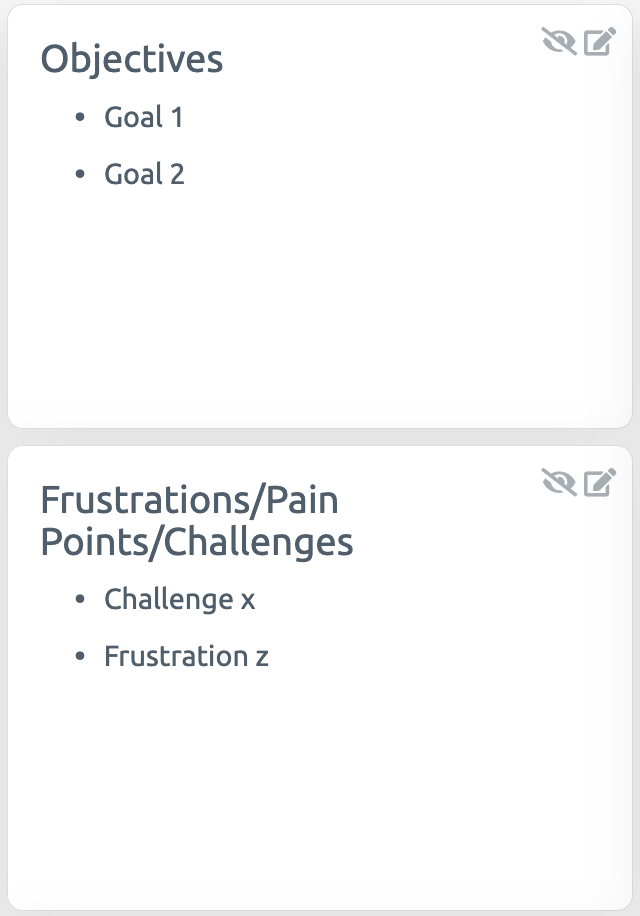
7 Afterwards, on the second column, click anywhere on the modal to write at least two of your persona’s objectives, as well as two frustrations/difficulties/challenges .
.
.
8 To learn more about your persona’s personality, drag the blue bar to the right or to the left.
.

.
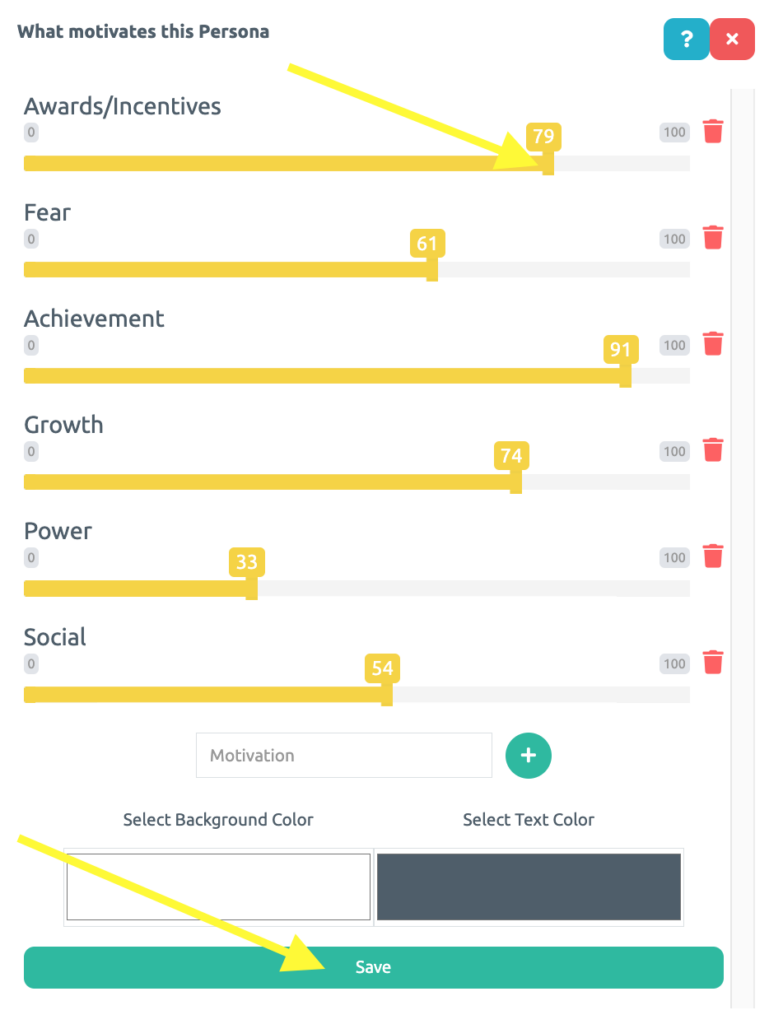
9 Establish from 0 to 100 by dragging the yellow bars to the right or to the left, to which extent your persona is motivated by prizes/promotions, by fear, by accomplishments, by growth, by power, and socially.
.
.
10 Then, drag the green bars to establish your persona’s preferred communication channels.
.

.
See you in the next tutorial and keep sharing good experiences with PeopleXperience! 💙


