.
Hey, eXplorer!
In this tutorial, I will teach you how to set a number of characters in Personalized Interactions:
.
1 Log in to the PX platform and click on Journeys on the menu.
.

.
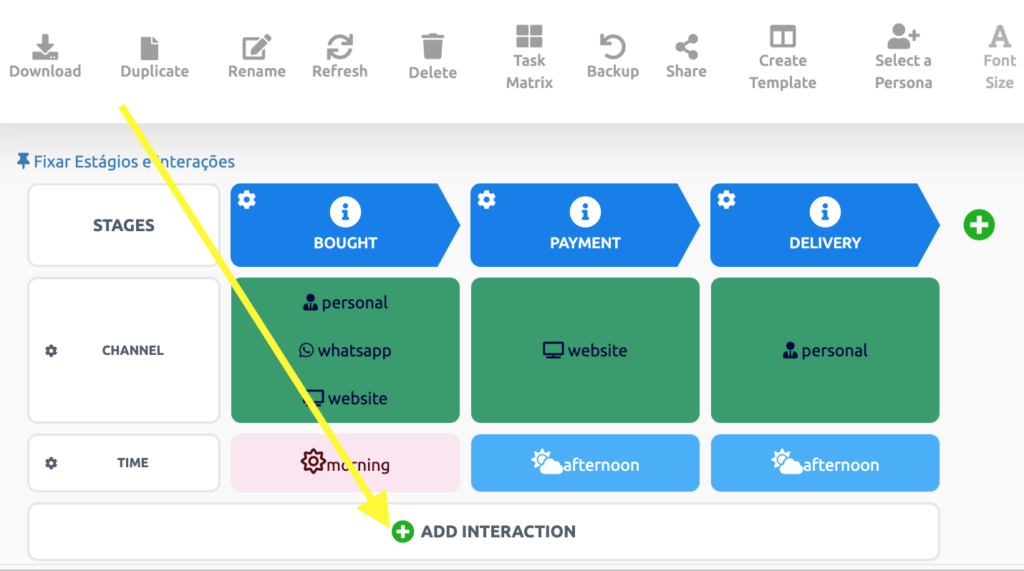
2 Select the Customer Journey Map you wish to edit and click on Add Interaction at the bottom of the map.
.
.
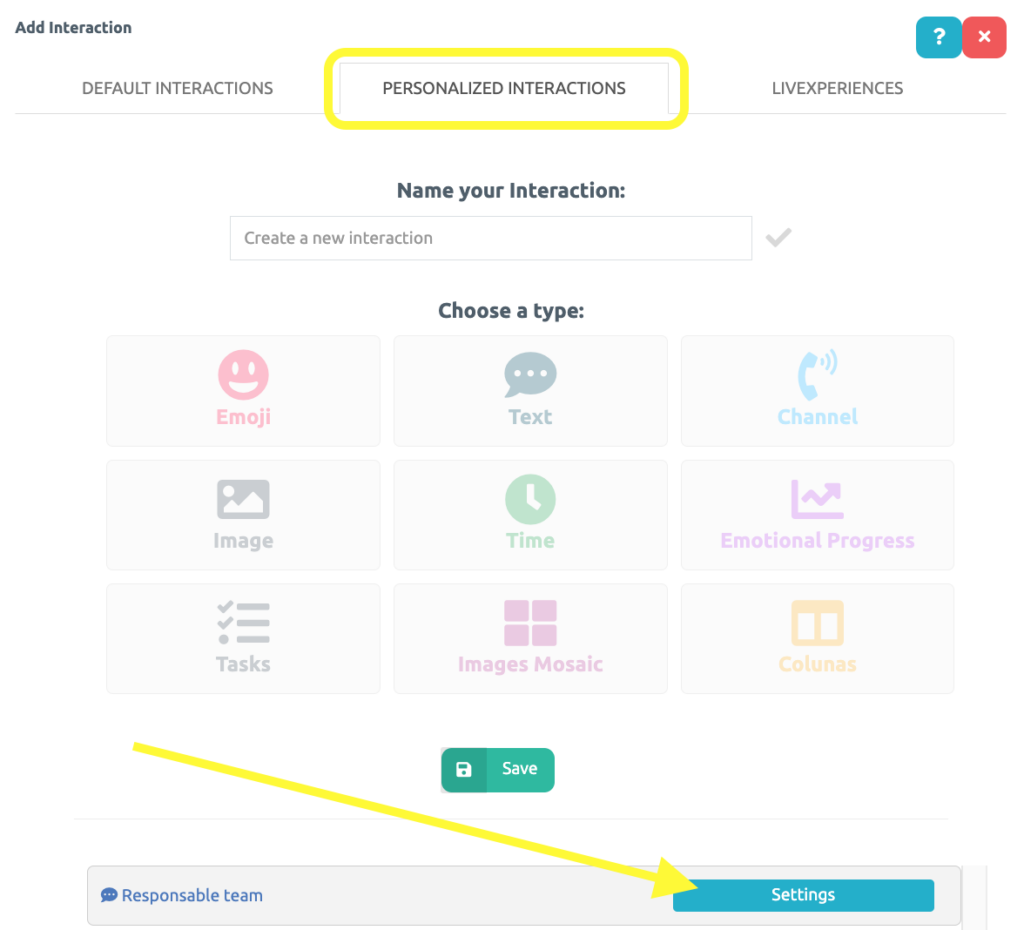
3 Personalized text interactions, and only those, have the option of choosing a number of characters. Access your Personalizes Interactions and click the highlighted button below Settings:
.
.
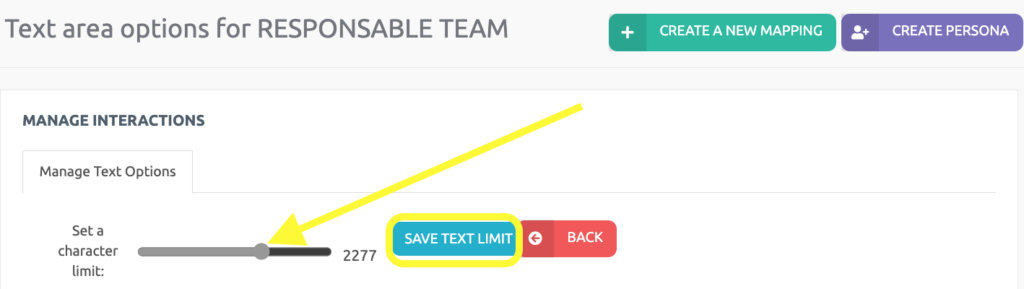
4 Drag the mouse over the indicated bar to set up to 3500 characters in your customized interaction, then, click on Save text limit. Lastly, click Return.
.
.
That’s it! Your character settings for this customized interaction have been established.
See you in the next tutorial and keep sharing good experiences with PeopleXperience! 💙


